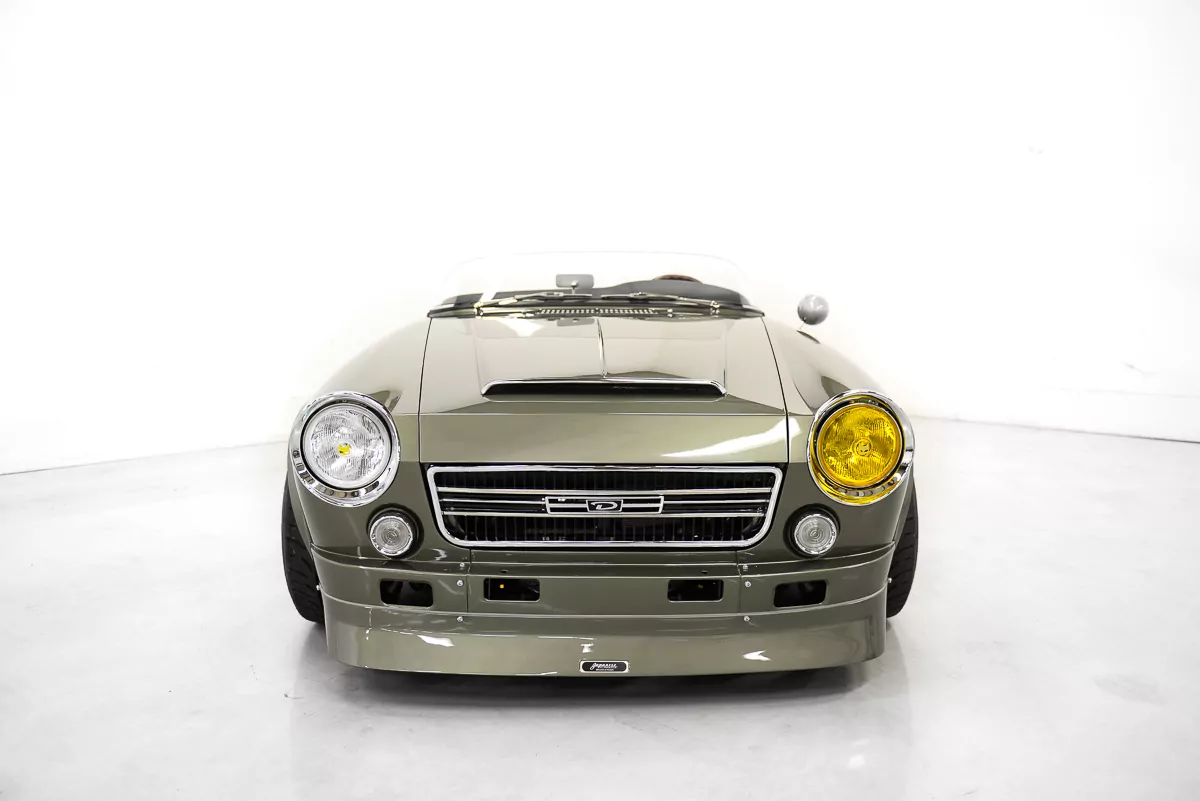
1966 Datsun Sports 1600 (Fairlady)
First and foremost, I think it’s important to mention that this build was not just a one-person build the entire team at Japanese Classics contributed to the build and shaped it into what you see today.
The first decision was to decide on an engine, the most important aspect of this build for me has always been to maintain a 60’s feel with the car, just modernized in all the right ways.
I think when you are building a car one has to consider the whole picture rather than individual parts. For example, we decided to keep the stock brakes vs upgrading to Z32 units that Spriso Motorsports offers so we didn’t need to run a larger diameter wheel. Personally, I was on the fence between 14″ and 15″ and a 16″ was never a consideration for this particular build.
The same applies to the engine. Since turbochargers were not really a thing in the 60’s I wanted to keep the car naturally-aspirated. The sound a car makes is just as important as how a car looks, in my opinion. The other factor that played a large role in the decision was reliability. I wanted to build a car that would start without hesitation, every time. I also didn’t want to burden the car with stand-alone having to tune and tweak constantly. I had actually bought ITB’s for the SR20 and decided not to use them due to this. After considering these factors the choice was clear, the Autech S15 SR20DE makes terrific NA horsepower and utilizes an OEM ECU to maintain reliability. Having an NA engine also has a few side benefits like a less cluttered engine bay, and a wicked header. Luckily Spriso Motorsports offers a SR20 mount kit for the Roadster chassis and made setting the engine in the correct place a breeze. Mike Poore our operations manager did the majority of the mechanical work on this build and spent months getting everything to a fit and finish level acceptable for a car being displayed at SEMA.
After making the decision on which engine to run, the thought hit me… What if Autech built a Roadster in the 60’s? What would they do? Of course, that comes with some creative liberty as the company wasn’t even a thought at that time. Better suspension, wider wheels and tires, wider flares, special seats, the ideas ran wild! I wanted the car to look and feel like a vintage race car, but also be refined and finished like a production car. So the tone was set for the build.
The suspension:
Terry at Fortune Auto and I go back a long ways. We have become extremely good friends over the years and one day he brought up building a car to display in his booth at SEMA. I jokingly suggested my roadster which was a far cry from SEMA worthy at the time. He loved the idea and so we ran with it. Incorporating Fortune Auto coilovers on the car was a must, so the body came off the frame and the design process started. We decided on a 4 link configuration for the rear, as we didn’t want to have crazy camber and wanted to maintain the OEM solid rear axle since we thought “that’s what Autech would do”, haha. Our shop manager Mike Poore designed and build the rear 4 link as he has an extensive background in building mini trucks. For the front suspension, we went back and forth on how to use the stock frame configuration and came up with several versions that would work. However, ultimately it was easier to just chop off the stock shock mounts and build a mini “shock tower” along with a custom lower and upper A-arm to get the suspension geometry correct. Sorry Autech, we doubt you would have done it this way, lol.
Paint and Body:
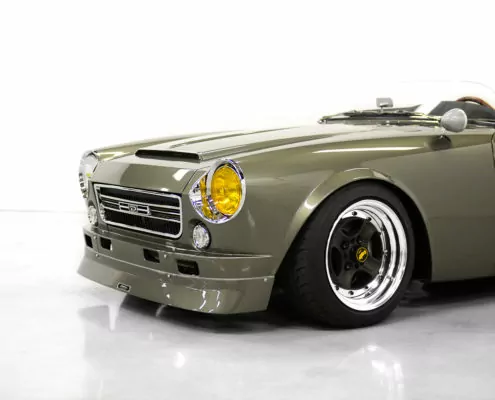
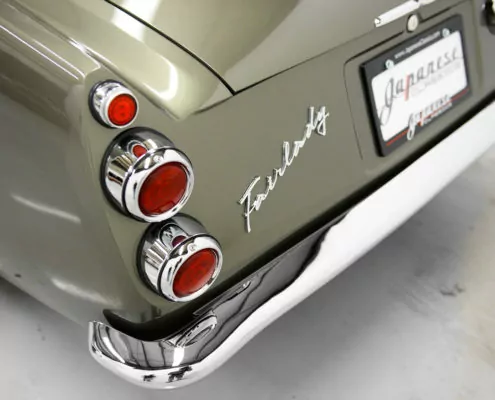
Now that the engine and suspension were mocked up and fitted the body was next in line. I wanted to change the rear fenders, I’ve always disliked the OEM fenders and prefer a round wheel arch in lieu of the awkwardly shaped OEM piece. Thankfully Ulterior Motives in California exists and we were able to give them the exact specifications and measurements of the flare we wanted to build. We have used them in the past for previous builds and they always do a phenomenal job. We wanted the rear flare to mimic the front flare. It gets very skinny as it moves to the middle of the car and fatter as it moves to the front. The rear flares do the same thing but they are a tad larger. Our goal was to make the flare appear as if it could be a factory piece. Our restoration manager Andrew Clarke did the majority of the body and paintwork on the car and spent about 3 months non stop on it. The body lines were sharpened up all over the car. Gaps were tightened up and new old stock later model 1969 fenders were installed, which have a larger flare than the original 1966 fenders. We also deleted the jack point in the rockers, the door locks, the marker lights on the fenders, and all of the soft top mounting points to clean up the body. The rear fenders were welded in place after much thought, trimming, and adjustment. After weeks of blocking the body was ready for paint. The issue was I hadn’t decided on a color yet and the car was in the booth. My original thought was to use a silver, it seemed fitting for the 60’s theme. It also seemed “boring as hell” according to our of our restoration techs. My other thought was to use the Autech green available on the R31 Autech Skyline, this color was a bit too dark though. So, we did about 20 different spray outs of the Autech color, each one tweaked just a little until we got the color you see here “Japanese Classics Green”. I think the end result was well worth the indecisiveness. The front lip was also made in house from scratch. We couldn’t find a front lip on the market that suited the look we were going for. Most had vents and mounted under the fenders and Peter Brock was kind enough to tell us why they all have vents in them, an extremely nice guy and I think it’s safe to say he built the first front lip or “air dam” for the little cars. During his time racing these cars, the rules specified no front air dams, however, he put “brake ducts” in the air dam and called it a brake duct which apparently was acceptable, and smart!
After getting the body back from paint the finished frame was sent out for powder coating along with much of the suspension arms. Once back the assembly started. We needed to get the car in one piece and the drivetrain permanently mounted so we could bring the car to our friends at Freed Engineering to build the complete intake and exhaust systems, radiator and shroud, and modify the valve cover. The look of the header was especially important and as always Freed went above and beyond even building a custom radiator shroud that looks as if it could be OEM.
The windshield was a tough project that was integral to the 60’s race car feel. The ultra-low windscreens found on vintage Ferrari and Porsche race cars were the inspiration behind it and really ties everything together in one cohesive theme. However, I like to drive my cars and such a low windshield with no top isn’t ideal for driving a lot. So we made the windshield modular. The screen unbolts from the car and the 1/4 glass caps on the door also unbolt. This allows for the OEM windshield and frame to bolt into place along with the 1/4 glass frames after which an OEM (Japanese market) hardtop can also be bolted onto the car, making it usable in any weather.
The interior:
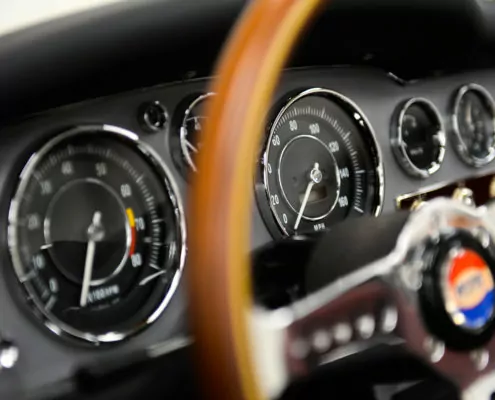
The seats were really the hardest part of the interior. I was shocked to discover how difficult finding a good vintage style race seat is. The Bride Histrix was really the only option worth looking at and considering we would just be reupholstering it any way we decided to just make our own. We used an early Nismo bucket seat from the 80’s as the base. First, we made a mold of the original seat. Next, we chopped up the seat to fit the roadster. We had 2 requirements: 1) the seat must be at the top of the body tub and not above it, 2) I needed to fit in it! After quite a bit of cutting and pasting we had the perfect seat. The rest of the interior design was done in house and Montross Upholstery took our paper drawings and made them a reality using only the finest leather supplied by Relicate Leather. They had the perfect distressed maroon leather to fit the theme and feel of the car. The door panels are completely one-off as well and trimmed to match the seats. The dash and gauges are actually stock. The gauges were sent to Global Tech Instruments who restored the original gauge faces and bezels but installed modern electronics inside the gauges to interface properly with the new SR20DE powerplant. All of the gauges function and we declined the popular “LED Upgrade” for backlighting to further maintain the theme of the car, in fact, no LED’s were used whatsoever in this build lol.
Wheels:
The Work Wheels Equip 40 has been a favorite wheel of mine since it’s release. I always wanted a set of Work Competition F3/F4 (the wheels the Eqip 40 is based on) but they were a race only wheel and only available in a center lock and also extremely rare. The Equip 40 looks classic enough to fit the theme of the car while at the same time having the perfect modern touch.
There are about a thousand other details I could go into like the valve cover which has over 40 hours of labor in it alone, the one-off oil cap (original to the stock R16 engine, made to fit the SR20) the custom rearview mirror and mount, Wilwood master cylinders, one-off throttle cable linkage, the list goes on and on.
You can learn more about our build in Larry Chen’s video for Hoonigan Autofocus here: https://www.youtube.com/watch?v=XSjnQFtAcUI


